Showing posts with label Windows. Show all posts

Adobe Photoshop CS6 Extended Full Path


Adobe photoshop CC 2015 membutuhkan spesifikasi komputer yang agak tingi, supaya dapat berjalan dengan baik. Bagi yang spesifikasi komputernya kurang mencukupi untuk menjalankan adobe photoshop cc 2015 tidak perlu berkecil hati, karena kali ini AleronBlack.com akan membagikan Adobe Photoshop Extended Full Path. Adobe Photoshop Extended Full Path adalah software edit foto yang sangat populer. Software yang di kembangkan oleh adobe ini memiliki fitur-fiture cangginh yang dapat anda gunakan untuk mengedit foto dan gambar.

ScreenShot :

Download :


System Requirements :

  • OS: Windows XP SP3, Vista, 7, 8, 8.1, 10
  • Pocessor: Pentium 4 or better
  • Memory: 1GB Ram
  • Storage: 2GB free hard drive space
Install
  1. Download adobe photoshop cs6 dan crack nya melalui link diatas
  2. Extrack kedua file yang sudah anda download tadi
  3. Matikan sambungan internet pada PC anda
  4. Jalankan installer adobe photoshop cs6
  5. Dan akan muncul pilihan Serial atau Try pilih saja Try, kemudian install seperti biasa
  6. Jika install telah selesai, Copy file amtlib.dll yang ada didalam folder Crack
  7. Kemudian Paste file amtlib.dll tadi kedalam folder instalasi Adobe Photoshop CS6 ( C:\Program Files\Adobe\Adobe Photoshop CS6\
  8. Selesai, Dan anda bisa kembali menyambungkan koneksi internet anda
Team AleronBlack.com

Cara Mengahapus GRUB Linux melalui Command Prompt


GRUB
Pada proses booting, program yang dijalankan pertama kali setelah BIOS selesai adalah GRUB (bila telah meng-install Linux). GRUB singkatan dari GRand Unified Bootloader, yaitu program kecil yang menampilkan pilihan sistem operasi pada saat proses booting sehingga nantinya dapat melakukan multiple boot. GRUB sangat berguna apabila kita menginstall lebih dari satu sistem operasi pada satu komputer, misalnya Microsoft Windows XP dan Linux Ubuntu. Istilah kerennya adalah dual booting. Biasanya default sistem operasi pada menu GRUB adalah Linux Ubuntu. Istilah “default” disini artinya adalah sistem operasi yang akan dijalankan secara otomatis apabila kita tidak memilih sistem operasi lain pada daftar menu GRUB. GRUB dapat di konfigurasi sesuai keinginan. Namun apabila salah dalam pengeditan maka saat booting GRUB tidak akan dapat masuk ke system operasi yang tersedia. Letak konfigurasi GRUB adalah /boot/grub/menu.lst


Bagi anda yang saat ini menginstall Dual Boot antara Linux dan Windows, lalu anda punya pemikiran untuk menghapus Operating System Linux anda dan ingin kembali seperti semula yaitu menggunakan satu Operating System Windows saja. Terkadang mungkin anda berpikir untuk secara langsung menghapus Partisi File System Linux dan Swap anda bisa menggunakan CD Installer Windows/Linux,Windows Management, dsb, tetapi dengan menggunakan Cara seperti itu tetap saja masih salah dan dapat berakibat fatal yang menyebabkan komputer anda tidak dapat Booting sama sekali.

Dan berikut adalah cara menghapus GRUB linux menggunakan Mbrfix :

  • Download Mbrfix nya dulu Disini
  • Extrack Mbrfix di direktory local Disk C:
Cara Menghapus
  • Run CMD dan ketikan perintah :  mbrfix /drive 0 fixmbr /yes

  • Oke sekarang GRUB sudah terhapus dan selanjutnya tinggal kita hapus partition yang kita buat untuk install linux tersebut
  • Klik Start -> Klik Kanan di MyComputer -> Pilih Manage seperti gambar dibawah ini
  • Setelah itu akan muncul jendela Computer Management kemudian Expand Kursor ke Grup Storage lalu pilih Disk Management seperti Gambar dibawah ini

  • Langkah terkakhir klik kanan pada partisi Linux anda lalu pilih Delete Volume, seperti gambar dibawah ini

  • Oke sekarang tinggal kalian restart komputer kalian dan selamat GRUB telah terhapus sempurna tanpa ada masalah.

Mempercepat tampilan menu di start menu windows 7

Waktu tunda tampilan start menu di windows 7 secara default di setting oleh windows pada angka 400 ms. Anda bisa mengubahnya menjadi lebih cepat agar saat anda berpindah dari satu item start menu ke item lainnya akan terlihat efek perpindahan agak cepat dari kecepatan standarnya. Mengubah waktu tunda ini (menu show delay) tidak akan merusak windows.

Untuk mengubah menu show delay startmenu windows 7 agar tampilan start menu lebih cepat bisa lakukan prosedur berikut


  • Di kotak search ketik regedit, kemudian enter

  • Buka direktori Computer\HKEY_CURRENT_USER\Control Panel\Desktop Double klik pada Menu show delay pada kotak dialog yang muncul ubah nilai value data dari 400 menjadi 0 atau 1 Klik OK


Restart komputer, jika pengaturan berjalan normal maka saat membuka menu akan lebih cepat dari kondisi semula

Menonaktifkan (disable) automatic update di windows 7

Automatic update adalah sebuah fitur yang tersedia di windows yang berfungsi untuk membantu pengguna windows untuk mengupdate secara online windows yang telah terinstal di komputer pengguna. Jika anda tidak mempunyai koneksi internet atau anda tidak ingin mengupdate windows 7 anda secara online, maka fitur ini bisa dinonaktifkan (disable automatic update)

Berikut ini cara menonaktifkan automatic update di Windows 7:


  • Di start menu pilih Control Panel

  • Pilih System and Security

  • Pilih Windows Update


  • Pilih never check for updates (not recommended) Lepas centang
Give me recommended updates the same way
 I allow all user.......


  • Tampilannya akan seperti di bawah ini Klik OK


Menonaktifkan (disable) error reporting windows 7

Error reporting adalah sebuah aplikasi services yang tersedia di windows 7, fitur eror reporting ini berfungsi untuk mengirimkan permasalahan (error) yang terjadi pada komputer anda langsung ke situs microsoft, berdasarkan laporan tersebut tim teknis microsoft akan melakukan  menganalisa penyebab error  (error analysis windows) dan selanjutnya mengirimkan solusinya untuk anda. Jika anda tidak memanfaatkan fitur error reporting ini lebih baik dinonaktifkan saja, agar bisa menghemat pemakaian memori dan tentunya secara tidak langsung akan performa windows 7.

Untuk menonaktifkan fitur error reporting di windows 7 lakukan langkah-langkah berikut


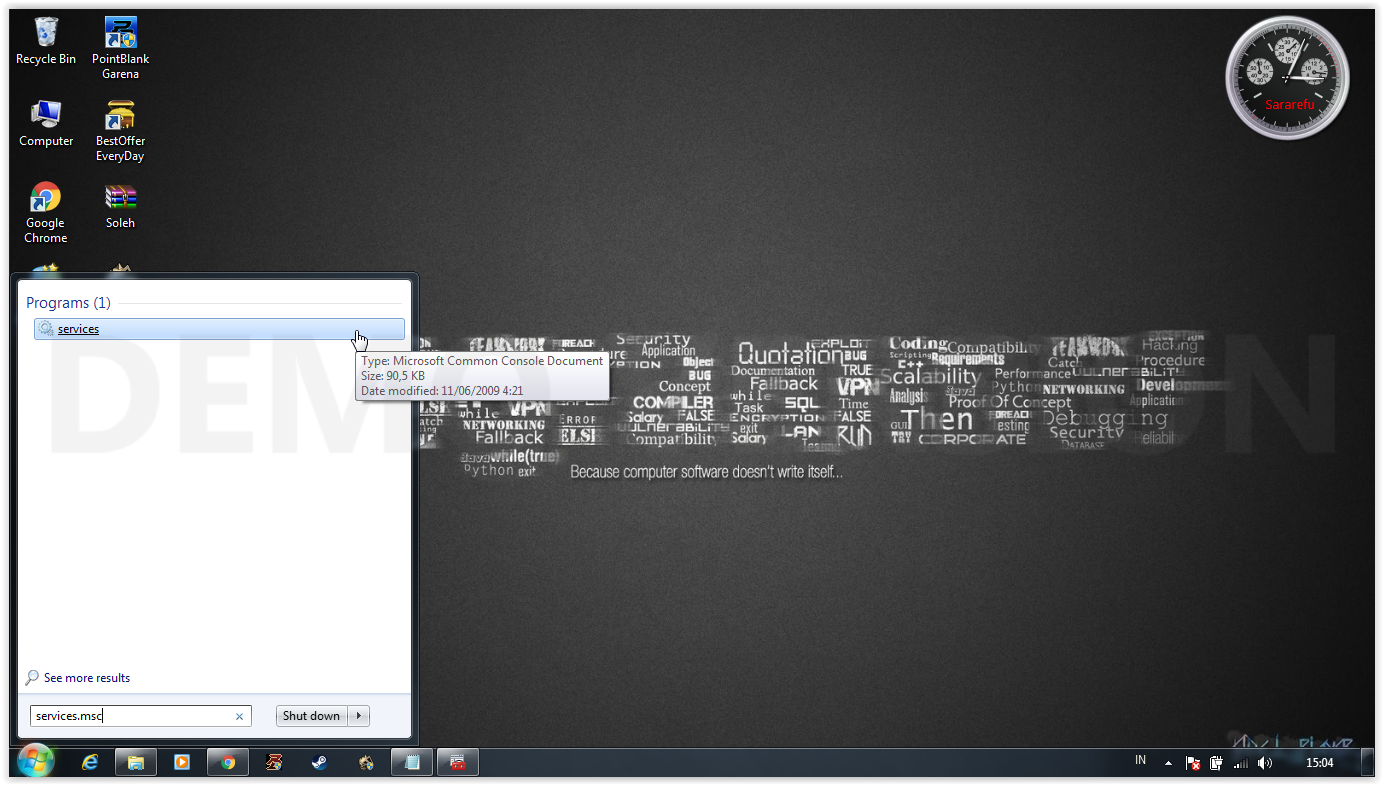
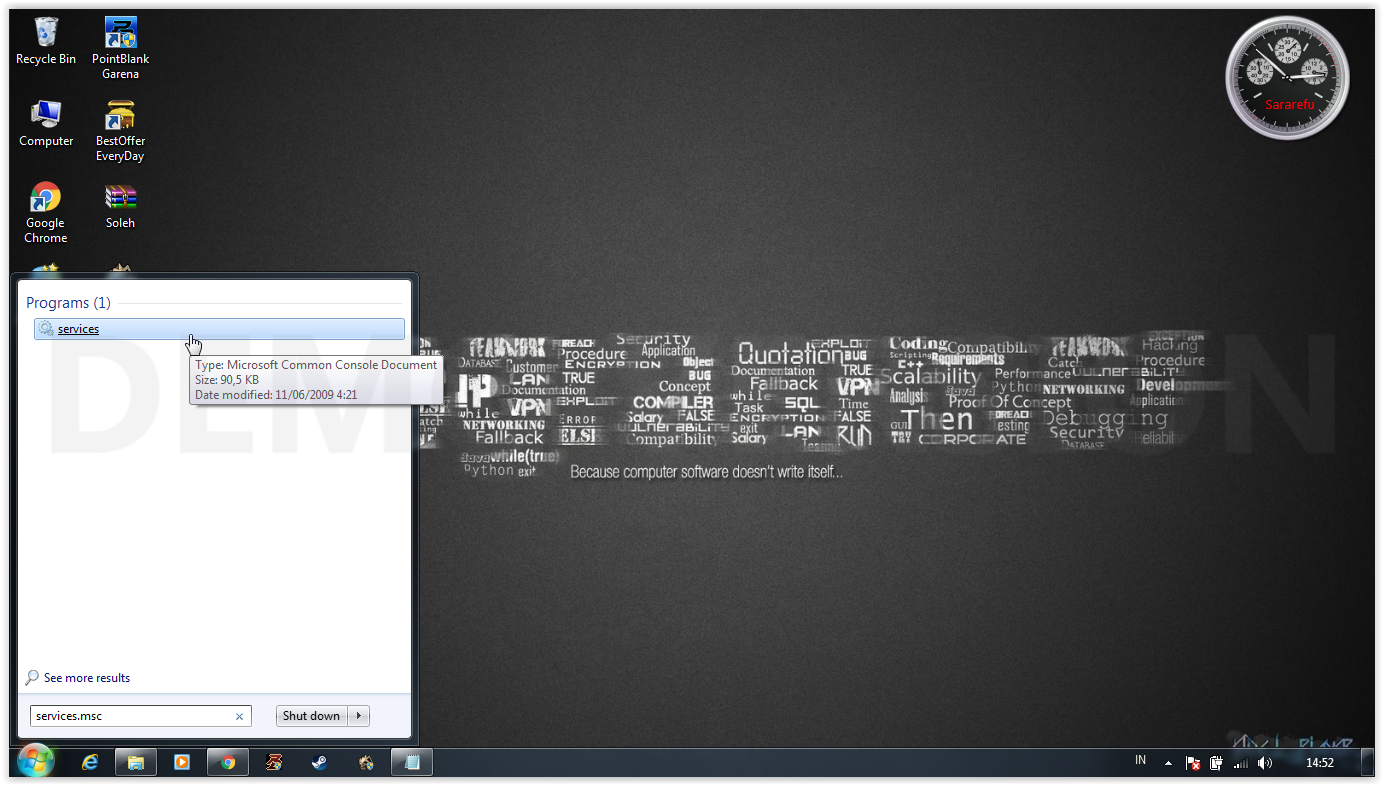
  • Pada kotak search ketik services.msc kemudian enter

  • Klik pada Windows error reporting

  • Pada Start up type, pilih Disable klik Ok


Menonaktifkan (disable) fax service di windows 7

Fax services merupakan sebuah aplikasi services yang tersedia di windows 7, fitur ini berfungsi jika komputer anda terhubung ke mesin fax, atau menggunakan aplikasi fax di komputer. Jika anda tidak menghubungkan komputer dengan fax, sebaiknya fitur ini anda matikan /disable saja, agar tidak memberatkan dan membebani kinerja windows 7.

Untuk menonaktifkan (mematikan) fax service di windows 7, lakukan prosedur berikut:


  • Pada kotak search ketik services.msc kemudian tekan enter

  •  Di Window Services , Pilih Fax

  • Pada bagian Startup type, pilih Disabled Klik Apply, OK


Jika suatu saat ingin mengaktifkan ulang, pada gambar di atas dibagian Startup type, pilih Enabled


Menonaktifkan (disable) telephony service di windows 7

Telephony merupakan sebuah aplikasi services windows yang berfungsi untuk mengatur konfigurasi windows  saat menghubungkan komputer dengan telephone, Fitur ini bermanfaat jika menggunakan telephone atau saat membuat hp menjadi modem komputer anda untuk koneksi internet, dan berbagai aplikasi komunikasi data antara hp dan telephone.

Jika anda tidak menggunakan hp sebagai modem komputer, maka sebaiknya fitur telephony dinonaktifkan (disable), agar tidak memberatkan windows


  • Pada kotak search ketik services.msc kemudian enter

  • Dalam window Services Pilih Telephony

  • Pada bagian Startup type pilih disabled Klik Apply, OK


Jika suatu saat ingin mengaktifkannya maka ikuti langkah 1 sampai 3, kemudian pada gambar langkah 3 di bagian Startup type pilih enabled

Menonaktifkan autoplay/autorun di windows 7

Autoplay/autorun adalah salahsatu fitur windows yang berfungsi untuk membuka file yang berada di media data (CD/Hardisk Eksternal/Flashdisk,dll) secara otomatis. Ada beberapa kelemahan jika mengaktifkan fitur Autorun Windows ini, yaitu:


  1. Jika CD/Hardisk Eksternal/Flashdisk mengandung virus maka virus dapat dengan mudah menyerang komputer anda melalui fitur autorun windows 7
  2. Windows 7 akan mengalokasikan memori untuk fitur autoplay, sehingga bisa menguras memori komputer.
  • Di start menu, pilih Control panel

  • Pilih hardware and sound


  • Pilih Autoplay

  • Lepaskan/hilangkan centang pada "Use Autoplay for all media devices" Klik tombol Save


Jika setting autorun/autoplay berhasil, maka saat memasukkan sebuah CD ke dalam CD Player , CD tersebut tidak berjalan secara otomatis.

Uninstal Tablet PC component di windows 7

Windows 7 menyediakan Feature PC tablet component, fitur ini hanya berfungsi jika jenis komputer yang anda gunakan adalah type PC tablet, informasi tentang pc tablet bisa dilihat disini tablet pc . Jika anda hanya menggunakan PC (desktop) atau notebook, lebih baik anda menonaktifkan service tablet PC atau uninstal tablet pc component. Service ini di nonaktifkan agar windows tidak mengalokasikan memory pada service tersebut yang tidak anda digunakan sehingga bisa lebih menghemat memory komputer.

Untuk uninstal tablet PC di windows 7 bisa lakukan prosedur berikut:

  • Pada start menu, pilih Control Panel

  • Selanjutnya Pilih Programs


  • Kemudian pilih Turn windows feature on or off

 
  • Lepaskan centang pada Tablet PC components Klik OK

  • Tunggu hingga proses selesai
Dengan mematikan services yang tidak dibutuhkan tentunya akan membantu membantu meningkatkan kinerja Windows pada komputer.

Cara mempercepat windows 7 (meningkatkan performa windows 7)

Cara mempercepat windows 7 (meningkatkan performa windows 7)

Windows 7 merupakan produk windows terbaru dari microsoft. Secara default windows 7 menawarkan banyak  fitur yang sebenarnya tidak diperlukan oleh pengguna komputer desktop (perorangan). Jika fitur-fitur yang tidak terlalu penting tersebut di nonaktifkan atau dimatikan, maka bisa lebih meningkatkan performa windows 7 . Yang kita bahas disini bukanlah mengupgrade hardware, tetapi melakukan konfigurasi pada software windows.Karena jika melakukan upgrade hardware komputer yang membutuhkan biaya , sedangkan disisi lain bagi yang tidak punya biaya upgrade,  dapat meningkatkan kinerja windows dengan sedikit memodifikasi konfigurasi defaultnya.

Berikut ini beberapa tips untuk mempercepat /meningkatkan performa windows 7


Disable / menonaktifkan service windows yang tidak perlu, seperti:
    Menonaktifkan autoplay/autorun di windows 7
    Cara Uninstal Tablet PC component di windows 7
    Cara menonaktifkan (disable) automatic update di windows 7
    Mempercepat tampilan menu di start menu windows 7
    Menonaktifkan (disable) telephony service di windows 7
    Menonaktifkan (disable) fax service di windows 7
    Menonaktifkan (disable) error reporting windows 7

    dll


    Menambah virtual memory windows
    Jika ukuran hardisk besar, sebaiknya bagi ruang hardisk menjadi beberapa bagian melalui partisi hardisk
    Lakukan scandisk dan defrag menggunakan disk defragmenter secara berkala. Dengan melakukan scandisk dan defrag secara berkala dapat membantu windows menandai sector dan cluster baik dan yang rusak di dalam ruang hardisk, serta dapat membantu windows mengurutkan dan mengelompokkan data-data yang disimpan di hardisk seperti file system, file aplikasi, dan file data agar lebih sesuai dengan kebutuhan system sehingga lebih mudah diakses oleh windows.
    Membersihkan file sampah windows, seperti menghapus file temporer,file prefetch windows , membersihkan file registry yang rusak (error), menghapus thumbnail chace explorer ,
    Scan virus dan adware , malware dan spyware secara berkala serta jangan lupa update antivirus secara offline maupun secara online.
    Instal aplikasi secukupnya,  dll

    Cara menambah virtual memori untuk meningkatkan performa windows 7

    Salah satu cara untuk meningkatkan performa (kinerja) yang bisa mempercepat windows 7 anda adalah dengan menambah virtual memori (virtual memory). Virtual memory adalah memori tambahan yang dapat diambil dari ruang kosong (free space) yang ada di hardisk. Windows menyediakan fasilitas ini untuk menunjang atau meningkatkan performa komputer (pc atau notebook). Secara default windows akan mengalokasikan ruang kosong di hardisk anda sesuai dengan batas minimum kebutuhan Windows , tetapi dengan pengaturan secara manual, kita bisa menambah ruang virtual memori komputer. Memori virtual ini akan digunakan oleh windows secara otomatis jika memori fisik  telah terpakai penuh oleh aplikasi windows, Dengan menambah virtual memory  maka kita dapat menghindari munculnya pesan "low virtual memory...".

    Berikut ini adalah prosedur atau cara untuk menambah virtual memori windows 7:


    1. Klik Kanan Pada Icon Computer Pilih Properties

          2. Pilih Advanced system settings


         3. Pilih tabulasi Advanced dan Pilih tombol Settings


        4. Dalam kotak dialog Performance Option Pada bagian virtual memory pilih tombol Change


         5. Lepaskan centang "automatically manage paging file size for all drives" Pilih option Custom size Isi bagian initial size (MB) : 1000 (sesuaikan dengan kapasitas ruang kosong di hardisk anda) Isi bagian maximum size (MB) : 2000 (sesuaikan dengan kapasitas ruang kosong di hardisk anda bisa lebih besar atau lebih kecil dari nilai tsb) Dan klik tombol Set


         6. Restart Komputer Anda


    Pengaturan virtual memory ini hanya bermanfaat jika kapasitas memory telah penuh digunakan oleh berbagai aplikasi yang sedang berjalan di komputer.

    Download IDM 6.11 Build Final Patch Full Crack

    IDM adalah suatu aplikasi untuk mengunduh suatu file, IDM di rancang khusus untuk mempercepat download, memberitahukan kecepatan transfer kepada pengguna, dan masih banyak lagi keuntungannya, namun untuk menggunakan IDM anda harus mempunyai serial code, yang harus di beli langsung kepada Admin IDM. tapi anda jangan repot repot karna kami sudah mengcrack IDM sehingga anda tidak perlu


    Cara Install :

    1. Download IDM + Patch 
    2. Extrack filenya
    3. Install IDM
    4. Jangan dulu di buka IDM nya Patch IDM. dengan cara copy patchnya taruh di file C > programfiles > IDM > buka patchnya > dan pilih patch 
    5. Selesai
    Salam :
    • AbayDashShilva

    Cara Membuat Linux USB Installer Dengan Menggunakan Universal USB Installer V.1.9.5.2

       
           Hay sob, kali ini saya akan memjelaskan gimana cara nya membuat bootable USB driver Linux dengan menggunakan Universal USB Installer, cocok nih buat sobat yang malas buat burning ke DVD, mendingan sobat manfaatin flashdisk sobat yang kagak kepake untuk dijadiin bootable Usb Driver Linux sob.

          Sobat juga harus tau kalo untuk membuat bootable usb driver linux itu gak sembarangan sob, jadi harus bener-bener teliti untuk membuat nya,

          Nah bagi sobat yang mau bikin bootable usb driver linux, siliahkan sobat download Universal Usb Driver Installer V1.9.5.2 ( disini disarankan sobat menggunakan versi terbaru ) untuk Usb Driver Installer ini sudah bisa digunakan untuk semua versi Linux , monggo sob di download dulu softwarenya dibawah ini.


    • Jika software nya sudah di download, sobat cukup Run administrator aja ( Recomendasi biar stabil ) kalou sudah keluar usb installernya , kemudian sobat klik I Agree sampai muncul tautan seperti ini sob


    • Lalu sobat pilih type linux yang mau sobat install ke usb sobat, untuk percobaan saya menggunakan linux ubuntu


    • Setelah itu sobat klik tombol browse dan klik file linux ISO sobat yang mau sobat install ke usb

    • Kemudian sobat klik file ubuntu nya ( contoh ubuntu 14.04 ) lalu open

    • Lalu klik select USB Driver ( sobat pilih usb yang ingin sobat gunakan )

    • Klik create

    • Jika muncul jemdela seperti ini sobat klik yes aja

    • Kemudian sobat tinggal menunggu sampai proses nya selesai


              Gambar diatas itu sedang dalam proses sob, setelah proses nya selesai nanti akan ada pilihan untuk close, sudah deh tinggal sobat close aja, dan udeh deh juga flashdisk sobat udah siap untuk dijadikan Linux USB Installer.

             Maka selesai lah akhir dari tutorial ini, dan saya mengucapkan banyak-banyak terima kasih atas kunjungan sobat, sekian dan semoga berhasil, Kalian Luar Biasa, hehehehe


    Perintah Dasar CMD


     ADDUSERS     Add or list users to/from a CSV file
       ADmodcmd   Active Directory Bulk Modify
       ARP               Address Resolution Protocol
       ASSOC           Change file extension associations•
       ASSOCIAT     One step file association
       AT                  Schedule a command to run at a specific time
       ATTRIB          Change file attributes
    B
       BCDBOOT    Create or repair a system partition
       BCDEDIT      Manage Boot Configuration Data
       BITSADMIN  Background Intelligent Transfer Service
       BOOTCFG    Edit Windows boot settings
       BROWSTAT
      Get domain, browser and PDC info
    C
       CACLS         Change file permissions
       CALL           Call one batch program from another•
       CERTREQ   Request certificate from a certification authority
       CERTUTIL   Utility for certification authority (CA) files and services
       CD               Change Directory - move to a specific Folder•
       CHANGE     Change Terminal Server Session properties
       CHKDSK      Check Disk - check and repair disk problems
       CHKNTFS    Check the NTFS file system
       CHOICE       Accept keyboard input to a batch file
       CIPHER       Encrypt or Decrypt files/folders
       CleanMgr    Automated cleanup of Temp files, recycle bin
       CLIP            Copy STDIN to the Windows clipboard
       CLS             Clear the screen•
       CMD            Start a new CMD shell
       CMDKEY     Manage stored usernames/passwords
       COLOR       Change colors of the CMD window•
       COMP         Compare the contents of two files or sets of files
       COMPACT  Compress files or folders on an NTFS partition
       COMPRESS Compress one or more files
       CONVERT   Convert a FAT drive to NTFS
       COPY          Copy one or more files to another location•
       Coreinfo     Show the mapping between logical & physical processors
       CSCcmd     Client-side caching (Offline Files)
       CSVDE       Import or Export Active Directory data
    D
       DATE         Display or set the date•
       DEFRAG    Defragment hard drive
       DEL            Delete one or more files•
       DELPROF   Delete user profiles
       DELTREE   Delete a folder and all subfolders
       DevCon      Device Manager Command Line Utility
       DIR             Display a list of files and folders•
       DIRQUOTA File Server Resource Manager Disk quotas
       DIRUSE      Display disk usage
       DISKPART  Disk Administration
       DISKSHADOW Volume Shadow Copy Service
       DISKUSE    Show the space used in folders
       DOSKEY     Edit command line, recall commands, and create macros
       DriverQuery Display installed device drivers
       DSACLs      Active Directory ACLs
       DSAdd        Add items to active directory (user group computer)
       DSGet         View items in active directory (user group computer)
       DSQuery     Search for items in active directory (user group computer)
       DSMod       Modify items in active directory (user group computer)
       DSMove      Move an Active directory Object
       DSRM         Remove items from Active Directory
       Dsmgmt     Directory Service Management
    E
       ECHO        Display message on screen•
       ENDLOCAL End localisation of environment changes in a batch file•
       ERASE       Delete one or more files•
       EVENTCREATE Add a message to the Windows event log
       EXIT          Quit the current script/routine and set an errorlevel•
       EXPAND    Uncompress CAB files
       EXPLORER Open Windows Explorer
       EXTRACT   Uncompress CAB files
    F
       FC              Compare two files
       FIND          Search for a text string in a file
       FINDSTR   Search for strings in files
       FOR /F       Loop command: against a set of files•
       FOR /F       Loop command: against the results of another command•
       FOR           Loop command: all options Files, Directory, List•
       FORFILES Batch process multiple files
       FORMAT   Format a disk
       FREEDISK Check free disk space
       FSUTIL      File and Volume utilities
       FTP            File Transfer Protocol
       FTYPE       File extension file type associations•
    G
       GETMAC   Display the Media Access Control (MAC) address
       GOTO     Direct a batch program to jump to a labelled line•
       GPRESULT Display Resultant Set of Policy information
       GPUPDATE Update Group Policy settings
    H
       HELP     Online Help
       HOSTNAME Display the host name of the computer
    I
       iCACLS   Change file and folder permissions
       IEXPRESS Create a self extracting ZIP file archive
       IF       Conditionally perform a command•
       IFMEMBER Is the current user a member of a group
       IPCONFIG Configure IP
       INUSE    Replace files that are in use by the OS
    l
       LABEL    Edit a disk label
       LODCTR   Load PerfMon performance counters
       LOGMAN   Manage Performance Monitor logs
       LOGOFF   Log a user off
       LOGTIME  Log the date and time in a file
    M
       MAKECAB  Create .CAB files
       MAPISEND Send email from the command line
       MBSAcli  Baseline Security Analyzer
       MEM      Display memory usage
       MD       Create new folders•
       MKLINK   Create a symbolic link (linkd) •
       MODE     Configure a system device COM/LPT/CON
       MORE     Display output, one screen at a time
       MOUNTVOL Manage a volume mount point
       MOVE     Move files from one folder to another•
       MOVEUSER Move a user from one domain to another
       MSG      Send a message
       MSIEXEC  Microsoft Windows Installer
       MSINFO32 System Information
       MSTSC    Terminal Server Connection (Remote Desktop Protocol)
    N
       NET      Manage network resources
       NETDOM   Domain Manager
       NETSH    Configure Network Interfaces, Windows Firewall & Remote access
       NBTSTAT  Display networking statistics (NetBIOS over TCP/IP)
       NETSTAT  Display networking statistics (TCP/IP)
       NLSINFO  Display locale information (reskit).
       NLTEST   Network Location Test (AD)
       NOW      Display the current Date and Time
       NSLOOKUP Name server lookup
       NTBACKUP Backup folders to tape
       NTDSUtil Active Directory Domain Services management
       NTRIGHTS Edit user account rights
       NVSPBIND Modify network bindings
    O
       OPENFILES Query or display open files
    P
       PATH     Display or set a search path for executable files•
       PATHPING Trace route plus network latency and packet loss
       PAUSE    Suspend processing of a batch file and display a message•
       PERMS    Show permissions for a user
       PERFMON  Performance Monitor
       PING     Test a network connection
       POPD     Return to a previous directory saved by PUSHD•
       PORTQRY  Display the status of ports and services
       POWERCFG Configure power settings
       PRINT    Print a text file
       PRINTBRM Print queue Backup/Recovery
       PRNCNFG  Configure or rename a printer
       PRNMNGR  Add, delete, list printers and printer connections
       ProcDump Monitor an application for CPU spikes
       PROMPT   Change the command prompt•
       PsExec     Execute process remotely
       PsFile     Show files opened remotely
       PsGetSid   Display the SID of a computer or a user
       PsInfo     List information about a system
       PsKill     Kill processes by name or process ID
       PsList     List detailed information about processes
       PsLoggedOn Who's logged on (locally or via resource sharing)
       PsLogList  Event log records
       PsPasswd   Change account password
       PsPing     Measure network performance
       PsService  View and control services
       PsShutdown Shutdown or reboot a computer
       PsSuspend  Suspend processes
       PUSHD    Save and then change the current directory•
    Q
       QGREP    Search file(s) for lines that match a given pattern
       Query Process / QPROCESS  Display processes
       Query Session / QWinsta   Display all sessions (TS/Remote Desktop)
       Query TermServer /QAppSrv List all servers (TS/Remote Desktop)
       Query User    / QUSER     Display user sessions (TS/Remote Desktop)
    R
       RASDIAL  Manage RAS connections
       RASPHONE Manage RAS connections
       RECOVER  Recover a damaged file from a defective disk
       REG      Registry: Read, Set, Export, Delete keys and values
       REGEDIT  Import or export registry settings
       REGSVR32 Register or unregister a DLL
       REGINI   Change Registry Permissions
       REM      Record comments (remarks) in a batch file•
       REN      Rename a file or files•
       REPLACE  Replace or update one file with another
       Reset Session  Delete a Remote Desktop Session
       RD       Delete folder(s)•
       RMTSHARE Share a folder or a printer
       ROBOCOPY Robust File and Folder Copy
       ROUTE    Manipulate network routing tables
       RUN      Start | RUN commands
       RUNAS    Execute a program under a different user account
       RUNDLL32 Run a DLL command (add/remove print connections)

    S
       SC       Service Control
       SCHTASKS Schedule a command to run at a specific time
       SET      Display, set, or remove session environment variables•
       SETLOCAL Control the visibility of environment variables•
       SetSPN   Edit Service Principal Names
       SETX     Set environment variables
       SFC      System File Checker
       SHARE    List or edit a file share or print share
       ShellRunAs Run a command under a different user account
       SHIFT    Shift the position of batch file parameters•
       SHORTCUT Create a windows shortcut (.LNK file)
       SHUTDOWN Shutdown the computer
       SLEEP    Wait for x seconds
       SLMGR    Software Licensing Management (Vista/2008)
       SORT     Sort input
       START    Start a program, command or batch file•
       STRINGS  Search for ANSI and UNICODE strings in binary files
       SUBINACL Edit file and folder Permissions, Ownership and Domain
       SUBST    Associate a path with a drive letter
       SYSMON   Monitor and log system activity to the Windows event log
       SYSTEMINFO List system configuration
    T
       TAKEOWN  Take ownership of a file
       TASKLIST List running applications and services
       TASKKILL End a running process
       TELNET   Communicate with another host using the TELNET protocol
       TIME     Display or set the system time•
       TIMEOUT  Delay processing of a batch file
       TITLE    Set the window title for a CMD.EXE session•
       TLIST    Task list with full path
       TOUCH    Change file timestamps   
       TRACERT  Trace route to a remote host
       TREE     Graphical display of folder structure
       TSDISCON Disconnect a Remote Desktop Session
       TSKILL   End a running process
       TSSHUTDN Remotely shut down or reboot a terminal server
       TYPE     Display the contents of a text file•
       TypePerf Write performance data to a log file
       TZUTIL   Time Zone Utility
    V
       VER      Display version information•
       VERIFY   Verify that files have been saved•
       VOL      Display a disk label•
    W
       W32TM    Time Service
       WAITFOR  Wait for or send a signal
       WEVTUTIL Clear event logs, enable/disable/query logs
       WHERE    Locate and display files in a directory tree
       WHOAMI   Output the current UserName and domain
       WINDIFF  Compare the contents of two files or sets of files
       WINRM    Windows Remote Management
       WINRS    Windows Remote Shell
       WMIC     WMI Commands
       WUAUCLT  Windows Update
    X
       XCACLS   Change file and folder permissions
       XCOPY    Copy files and folders
       ::       Comment / Remark•

    Commands marked • are Internal commands only available within the CMD shell.
    All other commands (not marked with •) are external commands.
    External commands may be used under the CMD shell, PowerShell, or directly from START-RUN.